Wednesday, April 20, 2011

Meet Me in Wonderland: Prom 2011 Invitations and Placecards

The 2011 prom was beautiful!  The kids had a great time, and I had fun putting it all together.  In an effort to fully cover every detail, I am going to post several times over the next two weeks.  This is my first Prom 2011 installment starting at the beginning with the invitations.  My inspiration for the invitations came from a cute card found here.  After seeing it, I ordered the Alice in Wonderland stamps featured on that particular card.  Here is the final product:


On the opposite side, I made these cute little medallions and edged them with silver Stickles. The directions for making the medallion can be found on the same website listed above as my inspiration.


Supplies:  ribbon-Dollar Tree, cardstock and papers-Hobby Lobby, stamps-TJ Designs, glitter-Stickles

After cutting the pattern paper for our invitations, we had extra strips.  One of my students suggested using them for the place cards.  It was an excellent idea.  We stamped a variety of the images from the Alice in Wonderland set onto white card stock, inked the edges, and backed it with the pattern paper.  They were C-U-T-E!


To hold the place cards, we bent the tines on 200 forks.  The idea came from Sandi Genovese's online show: The Scrapbook Showgram found here.


With the place cards on them, aren't they adorable?


Last, but not least, we made cute tickets.  I found the rabbit by searching images with Google.  He is an exact match for our invites.


Well, I will be back in a day or two with my second prom installment.  Check back and happy prom!

Thursday, March 31, 2011

Midnight in Morocco

It has been busy busy here.  The scrapbooking lock in was a huge success.  The girls made some cute layouts, and most of us were awake all night!  Currently, we are knee deep in prom preparations and hoping to finish before the big day (April 16).  As promised, I am going to share photos from another previous prom.  In 2008, we hosted our Midnight in Morocco prom.  With it's deep purples, burgundies, and golds, it was amazing!  I hope you will agree...


I wanted the entrance to feel like walking into a tent.


Guests were greeted by Clyde, our paper-mache camel. Many students took pictures with him!


For more formal photos, they could meet with the photographers and have their prom pictures made in front of our Moorish arch and palm tree. It was simple, but made an elegant backdrop for the brightly colored prom dresses.


Inside, the dance floor was framed by more of our purple tent inspired draping.  Once again, I would like to point out what can be done with PVC pipes, buckets of sand, and fabric.  It truly set the dance floor apart from the rest of the room.  


The room at a glance.


The centerpieces for half of the tables were a variety of Moroccan lanterns that I bought at TJMaxx, Roxx, and Home Goods.  We set them on gold framed mirrors.  The other centerpieces were clear vases of large palm leaves.  The table numbers were made using purple and burgundy metal mirror.  We simple replaced the mirror part with the printed numbers.  I believe I bought them at the Dollar Tree (or at several Dollar Trees :) ).  As you can see, I am a bargain hunter.  I have to be in order to produce this type of prom on our small budget.  Besides, why spend a lot of money if it is not necessary?


As a take home treat, I bought several different apothecary jars from the stores mentioned above and filled them with candies.  I set them on a large gold framed mirror.  Students could fill a bag with candy as part of their favor.


The beverage table was also decorated with vases of palm leaves and palm leaves laying flat on the table.  I bought these two foot paper mache letters from Joanns to spell Morocco and painted them gold.  They made a great backdrop for the beverages.


To create this round table for the food, we rented four serpentine tables.  When fitted together, they form a circle with an opening in the middle.  It allowed us to put three palm trees in the middle that I bought at Sams Club.


Well, I hope you enjoy the pics of Midnight in Morocco.  Look for more photos of my previous proms and weddings!


Sunday, March 13, 2011

MIM: Make It Mine Family Layout

Well.  I do not know about you, but many times I need a creative spark.  For example, I sponsor a club at my school: the Heritage Club.  Each year (usually in the Spring), I have a scrapbooking "lock in." We scrap all night from 10pm until 6am.  Last year, I put together some page kits for the kids.  I am doing the same thing this year.  I am always pushed for time due to a busy schedule.  So, I fall back on my trusty inspiration: layouts by others from one of my favorite scrapbook magazines or from one of my favorite scrapping blogs.  As I prepare for this weekend, I thought I would share a layout from the last lock in.  The inspiration was a layout that I saw online.  You can see it here. My page is entitled Family. 


One detail that I truly love about this page is that it will allow me to showcase 13-14 photos if I choose. With four kiddies, I always have many photos, and I like to use as many as possible!


The pink tab is a blank card that can be pulled out to hold another photo or to provide space for journaling.


This layout also allowed me to use the papers that I had.  Each girl got nine squares for her second page, but not the exact same nine squares.  Each girl's page was slightly different, which they loved!

After this weekend's fun, I will post some of our new creations.  Until then, keep creating and smile!  Life is tooooo short. :)

Wednesday, February 23, 2011

A LOVE-ly Party

The Valentine Swap Party on Friday night was a great success.  My scrapbboking buds and I enjoyed a yummy spaghetti meal, some delicious desserts, and a fun embellishment exchange. 


The table was decorated in several shades of red and pink.  I made the table runner from three pieces of red flocked scrapbook paper.  I punched holes in the corners and attached them together with red ribbon.  It was very pretty and fairly cheap!


A friend loaned me the redchargers, and I invested a little money in the pink heart plates from Target.  They were 1/2 off the day after Valentine's day.  At the back of the chairs, you will see a scrapbook paper holder.  They cost about $1.00 each.  I filled each one with enough supplies to create 2-4 pages.  I kept my cost down by buying sale items that fit my color scheme and by splitting each item.  One pack of paper was enough to give each person 4-5 sheets, etc.


On the back of each chair, I attached sequined heart ornaments from Michaels.  I just tied them into the knot of the chair sash.  They were 50% off the week before Valentine's Day.


These are the centerpieces that I created.  I saved food cans small and large.  The really large ones pictured here came from my school's cafeteria.  I covered each one in pretty papers and ribbons.  They are filled with paper flowers made from dinner napkins rather than tissue paper.  They are more attractive and sturdier that the tissue paper would have been.  I do have to give a shout out to some of my students who donated their time to help me make the last of the flowers.  I fell a tad behind schedule because I had a sick child.  So, THANKS girls!


I loved checking out all the little goodies each girl included in her jars.  They included everything from rhinestones to fabric to die cut shapes.  And they are just so darn cute!


The dessert buffet table coordinated with the dinner table.  I made most of the desserts the night before the party.  My buds and I decorated each one the night of the party.  It was fun!  Everyone enjoyed joining in to help!


Miniature Cupcakes


Chocolate Covered Peanut Butter Ritz Bits


Oreo Cookie Balls


Chocolate Covered Strawberries


Miniature Reece Cup Cookies


Chocolate Covered Cherry Mice


I encourage you to host a scrapping party of some type for you and your friends.  Treat yourself.  You deserve it!


Tuesday, February 8, 2011

Be Mine Valentine Swap Party

I wanted to do something fun and new with my scrapbooking buddies.  SO, I decided to combine my love of party planning with my love of scrapbooking, and voila...the idea was born.  I am hosting an embellishment exchange party.  As an invitation, I decorated a tag and attached it to a gift bag.  The tag included instructions and suggestions for the swap:


Inside the bag, each participant received five small decorated jars in a particular color since there are five of us.  I chose red, white, pink, brown, and cream for Valentine's Day.  I decorated 25 jars, five of each color. 


We are each responsible for filling our jars with the specified color of embellishments.  For example, I got the five white jars in my bag.  I have to fill each jar with white embellishments.  My friend Susan received the five red jars and will fill them with red embellishments.  They can include buttons, brads, ribbon, lace, rhinestones, chipboard shapes, die cut shapes, etc.  It just has to FIT in the jar, and they are fairly small.  This helps cut the cost.  You can also cut and decorate your own shapes to put in the jars.  In a couple of weeks, I am going to host the party. We will swap jars so that each person gets one jar of each color.  I am decorating for the party in coordinating colors and putting together some paper sets as favors to go with the embellies.  Check back for photos of my completed jars, the party decorations and the party favors. 

Saturday, January 15, 2011

The Secret Garden

Besides raising four great kids and being a high school teacher, I am the junior class sponsor.  As such, I am in charge of the prom.  This is my fifth year as sponsor.  I am currently creating the invitations for this year's event.  My school is small with less that 500 students, and our budget is small.  So, we make many of our decorations, including the invitations to save money.  I love cheap!  So, while I am working on the current items, I wanted to share some of our previous items starting with Prom 2007: The Secret Garden.

This is the back of the invitation.  It is made from a 12x12 piece of cardstock. With a few cuts, it folds up.  To open, just untie the ribbon and fold it out.  For the flowers,  I bought some leis from a party store and took the apart.  I put a brad through the middle and attached them with a glue dot.

This is the entrance to the prom.  My dear hubby designed and put together this great awning.  He made it with pvc pipes and connectors.  We put the pipes down into buckets of sand so it would stand freely.  I covered it with lights and sheer fabric.  Add a couple of decorated topiaries from the Dollar General Store and presto!

This is at the entrance table where the students sign in and out.  We bought some natural colored fans, made little tags and attached them.  I really wanted to show you the sign that we made.  I used my Cricut to make the small letters and traced and cut the large letters.  The flowers are a variety of die cuts mixed with some of the flowers from the leis that I dismantled.

In the background here, you can see the dance floor.  We used pvc pipe, sand, buckets, etc for it also.  I wanted to set it apart from the rest of the room.

These are the tables.  We traced and cut the cute little favor boxes in the middle of each plate.  We filled them with candy.  The place card holders are tiny flower pots that I bought on sale.  We twisted wire and put it into styrofoam in the pots to hold the paper flowers.  The flowers were made with the Cricut, and we printed each person's name on clear labels to stick on each flower.  The table numbers were made with the school's Ellison die cut machine.


This is the cupcake stand that the students built with the help of a colleague.  I drew what I wanted and voila!  I had seen some cute cupcake tree stands, but they were cardboard.  I wanted something sturdier that could be reused.  Each level stacks.  So, I can use the top 2-3 tiers for a smaller event, such as shower or birthday party.  With all the tiers, it holds 350-400 cupcakes.


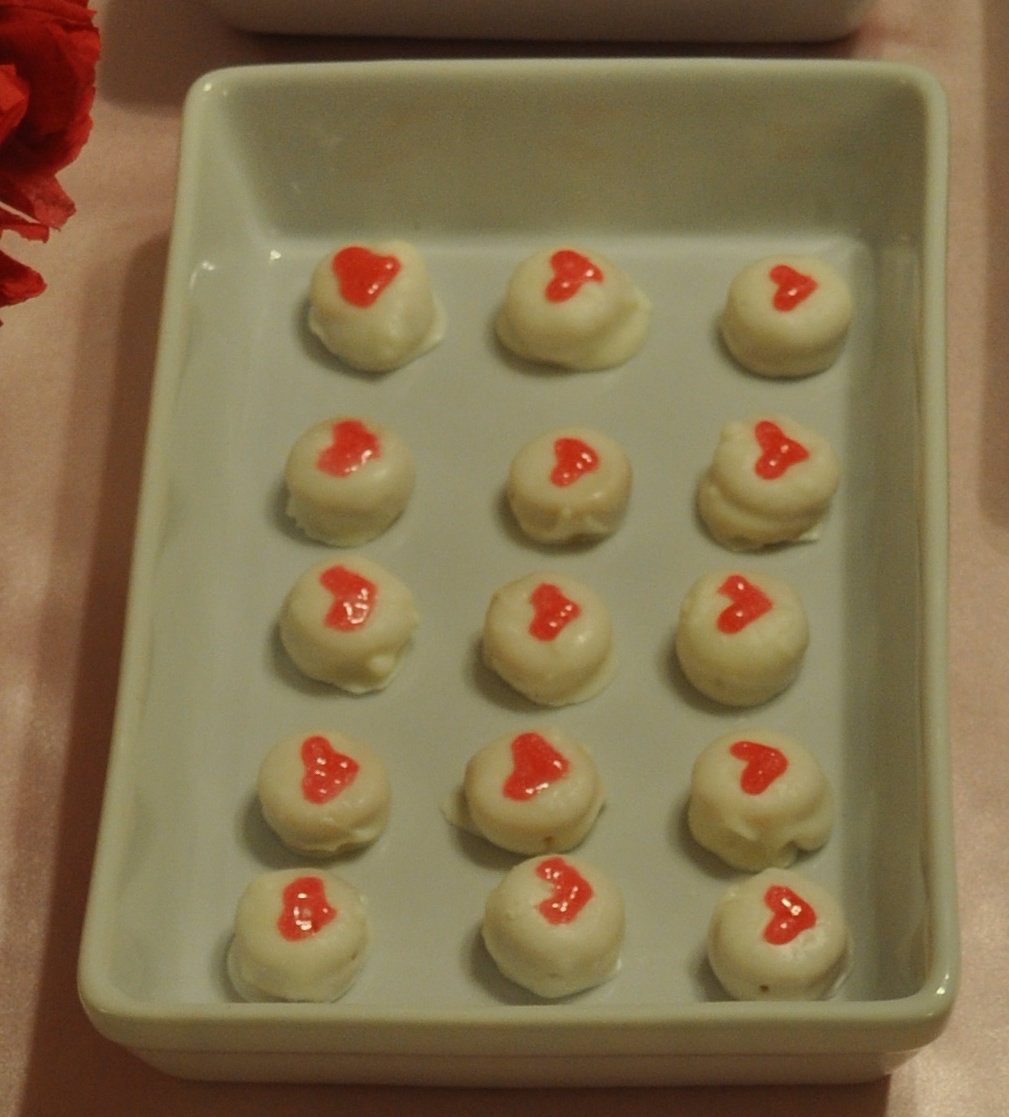
Last, but not least, I would like to show the beverage and food tables.  Doesn't it look yummy?
As I continue to blog, I will share more of my proms and wedding receptions here and there.  Be sure to check back.  Thanks for looking!